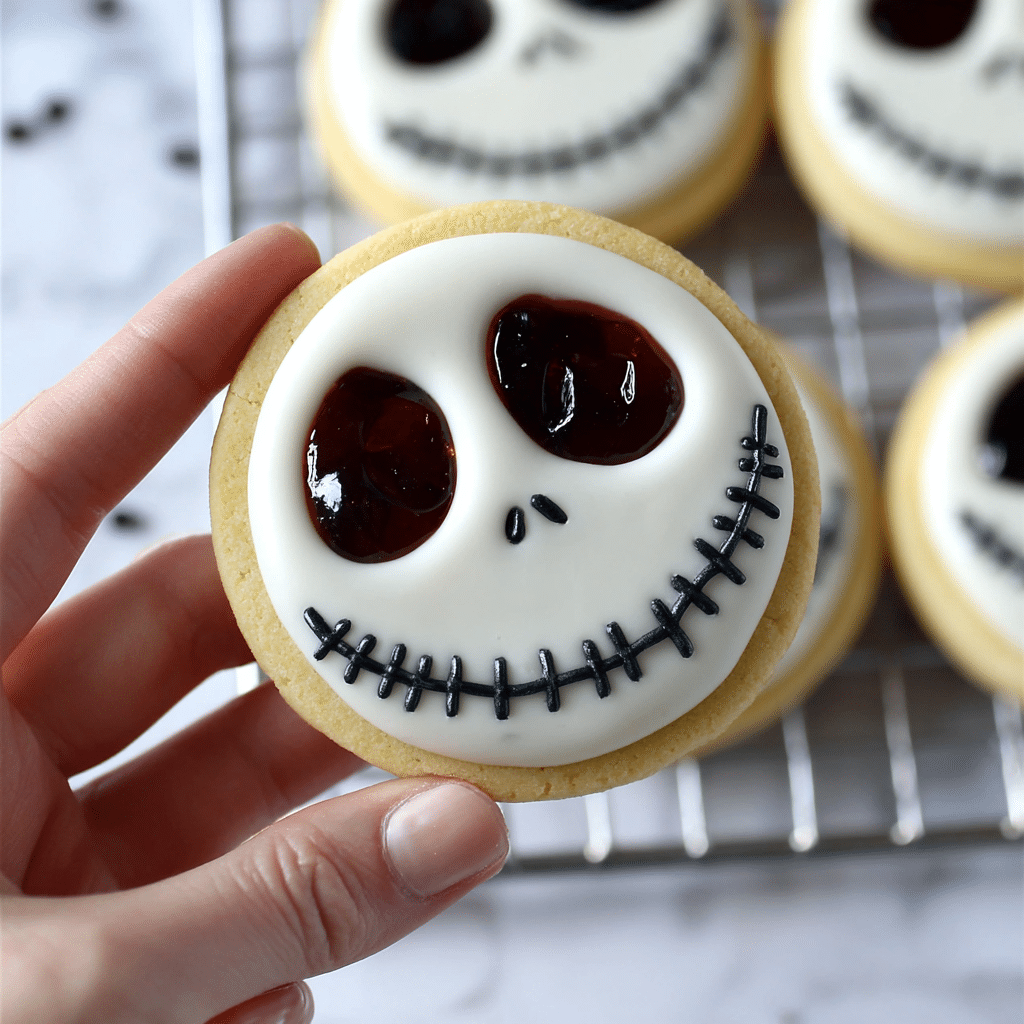
If you’re ready to conjure up some spooky deliciousness in your kitchen, these Jack Skellington Cookies are the ultimate treat! Inspired by the iconic Pumpkin King himself, they’re a ghoulishly fun twist on classic sandwich cookies, filled with tangy black cherry jam and finished with delightfully eerie faces. Jack Skellington Cookies are a showstopper at any Halloween party or Tim Burton-themed gathering, and they taste just as magical as they look—crisp, buttery shells, sweet jam, and a hint of vanilla icing all in one bite.
Ingredients You’ll Need
Every element in these Jack Skellington Cookies is chosen for maximum flavor, texture, and that perfect monochrome finish. Gather these pantry staples and a few specialty items, and you’ll see how simple ingredients add up to delightfully wicked results!
- Dairy-free block butter (cold and cubed): Essential for a tender, melt-in-your-mouth cookie texture, and it keeps the cookies perfectly vegan-friendly.
- Caster sugar: Gives the cookies light sweetness and contributes to that classic shortbread snap.
- All purpose / plain flour: Forms the structure and crumbly bite, holding everything together for easy rolling and cutting.
- Ice-water (if needed): Just a touch helps bring the dough together if it feels too crumbly; only add as much as you need!
- Black cherry jam (homemade or shop bought): Adds a tart, fruity punch at the center, with a gorgeously dramatic color.
- Icing sugar: The backbone for your decorating icing—smooth, sweet, and makes those faces pop.
- Vanilla extract: Enhances the icing with a cozy, aromatic undertone, making each bite extra special.
- Black food gel: Critical for creating those unmistakable Jack Skellington features, and gel type yields deep color without thinning your icing.
- Dairy-free milk: Used sparingly to loosen up the icing to perfect “dip and decorate” consistency.
How to Make Jack Skellington Cookies
Step 1: Mix the Cookie Dough
Start off by creaming the cold, cubed dairy-free butter with the caster sugar until the mixture becomes pale and impossibly fluffy. This step is crucial for the cookies’ tender bite. Next, sift in the plain flour and combine until you’ve got a thick dough—it should be pliable, but not dry. If it seems crumbly or too stiff, add ice-water drop by drop until it just comes together. Knead gently by hand or use your food processor. Wrap the finished dough in plastic wrap or baking paper, and chill it in the fridge for at least 40 minutes to an hour to let the flavors meld and the dough firm up for easier rolling.
Step 2: Prepare to Bake
While the dough chills, preheat your oven to 180°C with the fan on (that’s about 350°F if you’re working in Fahrenheit). Line your baking tray with grease-proof paper—you’ll thank yourself later for easy, stress-free cookie removal!
Step 3: Cut and Shape the Cookies
Once that dough feels nicely chilled and ready to work, sprinkle your worktop generously with flour and roll the dough out to about 1 to 1.5 centimeters thick. Use a circle cookie cutter to cut out as many rounds as possible, giving you those classic Jack Skellington Cookies shapes. On half of the cookies, cut out small eyes and nose holes—these will become your “faces.” Set all the rounds on your lined tray.
Step 4: Bake Until Just Golden
Slide your tray into the middle of the oven and bake the cookies for 10 to 12 minutes, rotating the tray halfway through for the most even browning. They’re ready when just golden at the edges. Let them cool briefly on the tray, then transfer to a wire rack to finish cooling completely. Repeat until you’ve baked all your dough.
Step 5: Make the Icing
While the cookies cool, whip up your icing: Mix icing sugar and vanilla extract with just enough dairy-free milk (add it in tiny increments!) to get a smooth, “toothpaste” consistency that’ll give you crisp lines and clean dips. Divide the icing, and color a portion with black food gel for the signature Jack look. Pop the black icing into a piping bag and snip the tip for detailed work.
Step 6: Decorate with Faces
Now for the fun part—dip the tops of the “face” cookies into the white icing, letting any excess drip away before setting them aside to dry. Once the white layer hardens a bit, pipe on Jack’s mouth and facial lines using the black icing. Allow everything to set so your cookies keep their spooky good looks!
Step 7: Fill and Assemble
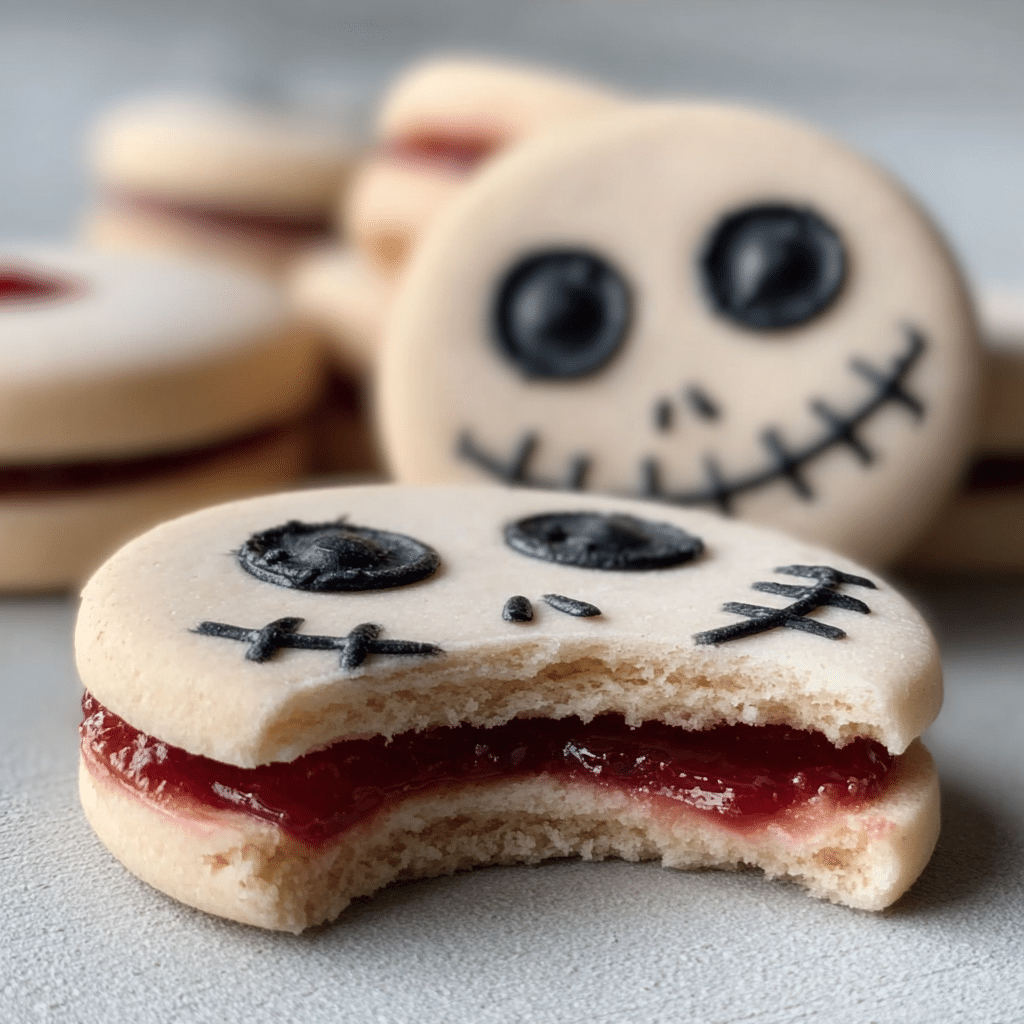
Turn over the non-face cookies and spread or pipe a little black cherry jam onto each one. Top with a decorated “face” cookie to form a sandwich, gently pressing so the jam stays neatly inside and doesn’t ooze out the eyes. That ruby-red burst in the middle is pure magic!
Step 8: Serve and Enjoy
Your Jack Skellington Cookies are officially ready to haunt the dessert table! Serve them up and watch everyone’s eyes light up at your edible masterpieces.
How to Serve Jack Skellington Cookies
Garnishes
A simple dusting of extra icing sugar just before serving can lend your Jack Skellington Cookies a whimsical, “fresh from the fog” effect. Or, if you’re feeling festive, scatter edible glitter or a few black sugar pearls around the platter for a shimmery, gothic touch.
Side Dishes
Nothing pairs quite as perfectly with these cookies’ dark cherry and buttery notes as a mug of rich, hot cocoa or a robust black tea. For Halloween parties, serve alongside a blood-red punch or some vegan vanilla milkshakes to bring out the playful, seasonal spirit.
Creative Ways to Present
Set your Jack Skellington Cookies on a bed of spiderweb cupcake liners, or arrange them in a coffin-shaped box lined with black napkins. For parties, group them on a cake stand draped in purple or orange ribbons—add some tiny figurines or themed decorations for a truly cinematic dessert table.
Make Ahead and Storage
Storing Leftovers
Place leftover Jack Skellington Cookies in an airtight container and store at room temperature for up to three days. The flavors actually get even richer on the second day, and the icing holds up beautifully as long as you keep the cookies away from heat and humidity.
Freezing
Both the unfilled cookies and the dough itself freeze wonderfully! Stack baked cookies between layers of parchment in a freezer-safe box, then freeze for up to a month. When you’re ready to decorate, let them come to room temperature before adding the icing and cherry jam for best color and texture.
Reheating
Jack Skellington Cookies don’t need reheating, but if you prefer a just-baked snap, you can pop plain (undecorated, unfrosted) cookies in a low oven for 2 to 3 minutes. Let cool, then decorate and fill as desired for that fresh-from-the-oven feel.
FAQs
Can I use regular butter instead of dairy-free?
Absolutely! If you’re not avoiding dairy, classic unsalted butter will work beautifully and yields an even richer flavor. Just be sure it’s cold and cubed before creaming with sugar for the best results.
What’s the best way to cut out Jack Skellington faces?
A small, sharp paring knife works wonders for making the eyes and noses on your “face” cookies. If you have a tiny round cutter (like a piping tip), it can help make those shapes even more uniform and adorable!
Can I use a different jam for the filling?
Certainly! While black cherry jam brings that dramatic color and flavor contrast, any tart jam—think raspberry, blackberry, or plum—can substitute nicely and give your Jack Skellington Cookies their own signature twist.
Will the icing set firm enough for stacking?
Yes, if you let the icing dry completely, it sets up firm and glossy. Allow the decorated cookies a few hours at room temperature before stacking or packing for parties.
How far in advance can I make Jack Skellington Cookies?
You can make and ice the cookies up to three days ahead; fill them with jam on the day you plan to serve for the freshest texture. Or, freeze undecorated cookies and decorate just before your event!
Final Thoughts
If you’re looking for a recipe that’s every bit as fun to make as it is to eat, Jack Skellington Cookies are simply unbeatable! Their sweet, spooky faces and lush cherry-jam centers always bring smiles and start conversations. Make a batch—your inner Pumpkin King will thank you!
Print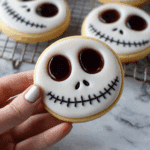
Jack Skellington Cookies Recipe
- Prep Time: 20 minutes
- Cook Time: 10-12 minutes
- Total Time: 1 hour 30 minutes
- Yield: About 24 cookies
- Category: Dessert
- Method: Baking
- Cuisine: American
- Diet: Vegetarian
Description
These Jack Skellington Cookies are a fun and spooky treat perfect for Halloween or any Nightmare Before Christmas fan. The buttery cookies are filled with black cherry jam and decorated with a simple icing to create Jack’s iconic face.
Ingredients
for the cookies
- 200g of dairy-free block butter (cold and cubed)
- 100g of caster sugar
- 300g of all purpose / plain flour
- Ice-water (if needed)
for the filling
- 50g of black cherry jam (homemade or shop bought)
for the icing
- 200g of icing sugar
- 1 teaspoon of vanilla extract
- Black food gel
- Dairy-free milk
Instructions
- Method (cookies) Cream the butter and sugar together until pale and fluffy. Sift in the flour, mix into a thick dough. If it’s too thick, you can add in a teaspoon of ice-water. You can combine by hand on a clean worktop or in a food processor. Transfer the dough into plastic wrap or baking paper and chill in the fridge for at least 40 minutes -1 hour to firm up.
- Preheat the oven to 180°C fan and line a baking tray with grease-proof paper.
- Roll out the chilled dough to approximately 1 – ½ cm thickness on a heavily floured work surface. Cut into rounds using a circle cookie cutter. Place the shapes on the lined baking tray. To half of the cookies, chomp out the eyes and nose shapes.
- Bake in the preheated oven for 10-12 minutes. Remove from the oven and cool on a wire rack.
- Method (icing) In a bowl, mix icing sugar and vanilla. Add dairy-free milk gradually until the icing reaches a thin, toothpaste-like consistency. Dip the top of the cookies with the face on into the icing, allowing excess to drip off. Let it dry.
- Color some icing with black food gel, transfer to a piping bag, and pipe on the mouth and details.
- Method (filling) Spread or pipe black cherry filling on cookies without faces and sandwich with iced cookies. Serve and enjoy!
Nutrition
- Serving Size: 1 cookie
- Calories: 180
- Sugar: 12g
- Sodium: 80mg
- Fat: 8g
- Saturated Fat: 5g
- Unsaturated Fat: 2g
- Trans Fat: 0g
- Carbohydrates: 25g
- Fiber: 1g
- Protein: 2g
- Cholesterol: 20mg

