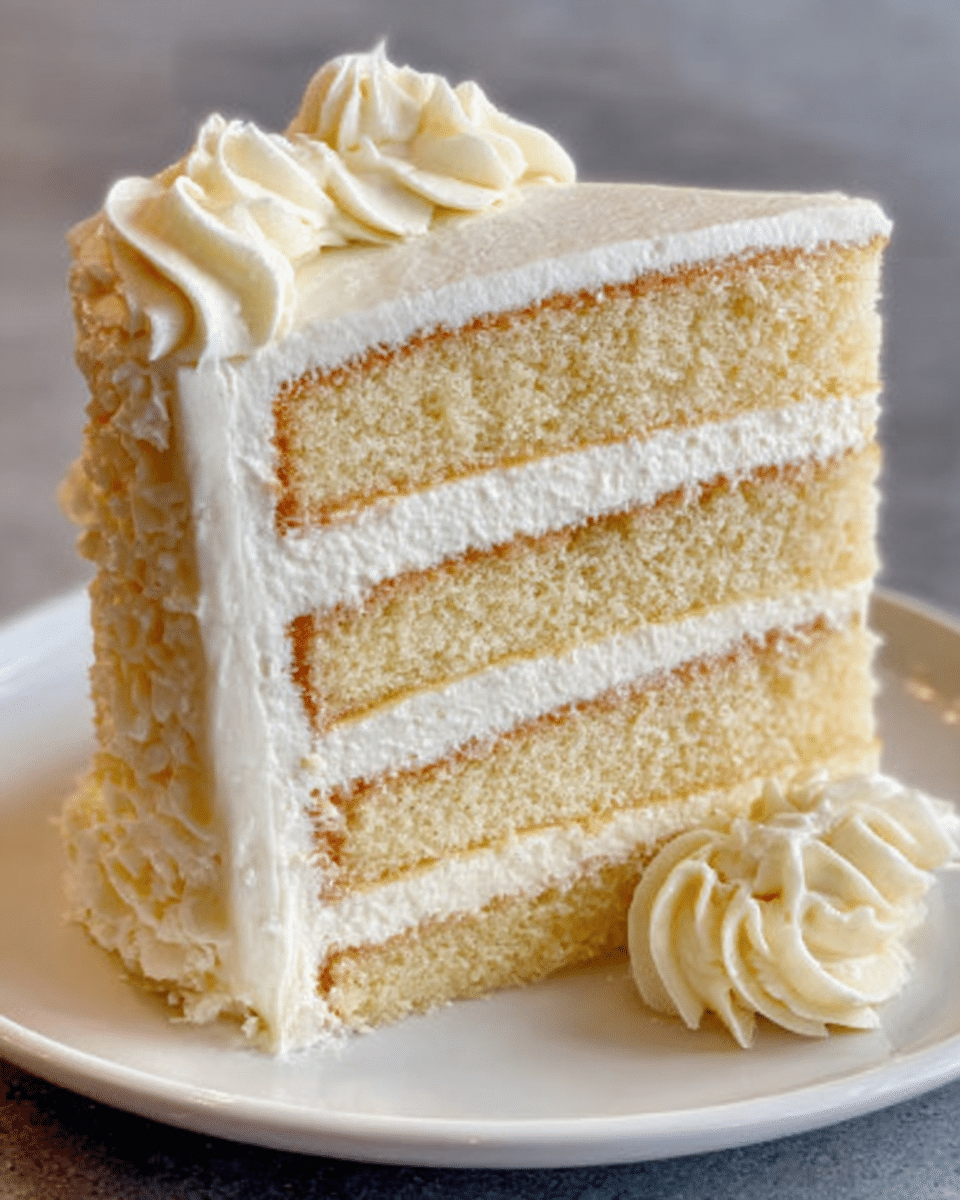
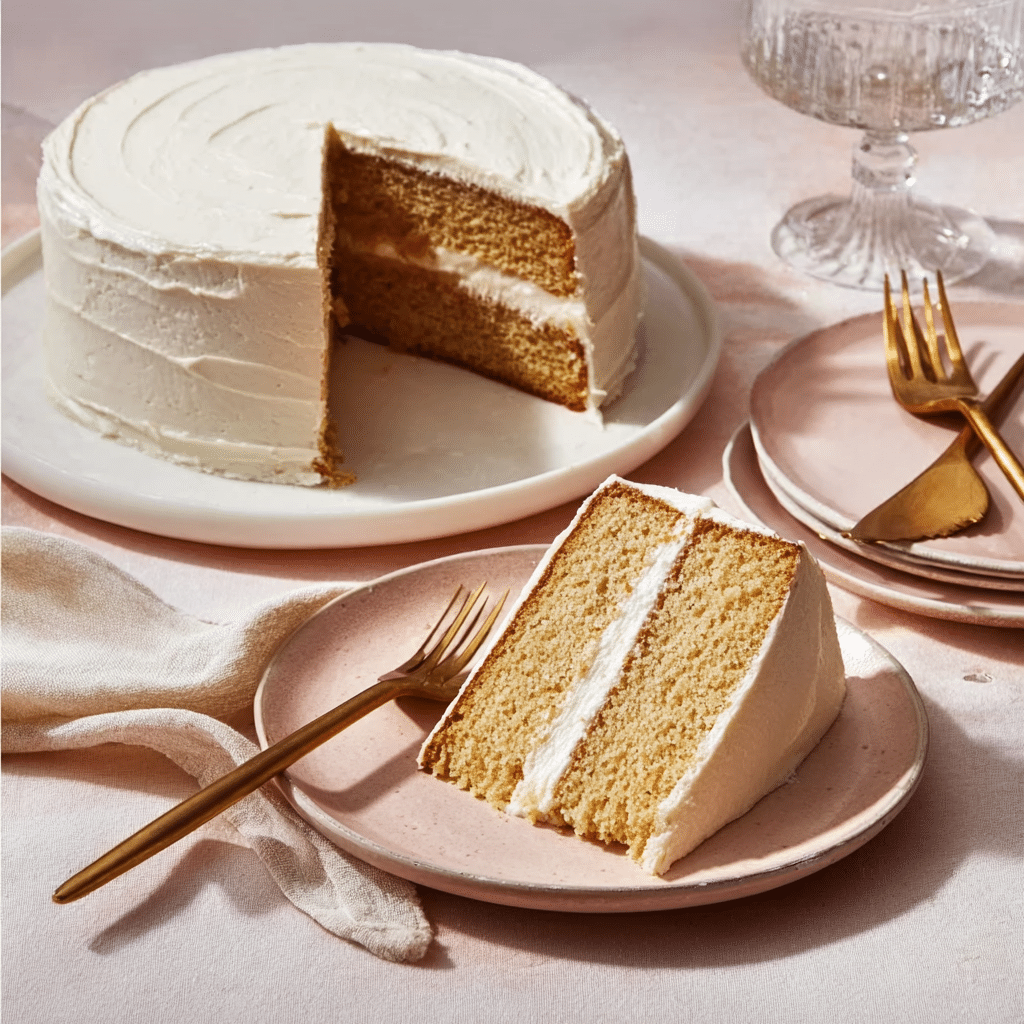
If you’re on the hunt for a show-stopping dessert with impressively tender crumb, look no further than Moist and Rich White Velvet Cake with Vanilla Buttercream. This classic bakery favorite strikes the perfect balance between rich, velvety texture and lush, creamy frosting, making it a dreamy treat for birthdays, celebrations, or even casual Sunday afternoons. Every bite is plush and flavorful, thanks to a blend of cream cheese, buttermilk, and a perfectly whipped vanilla buttercream that’s light as air. Whether you’re a cake-baking novice or a seasoned pro, this cake is about to become the one you crave—and love to share.
Ingredients You’ll Need
Let’s talk about the heart of every amazing cake: top-notch, straightforward ingredients! Each component of the Moist and Rich White Velvet Cake with Vanilla Buttercream plays an unmistakable role in delivering that signature pillowy texture and delicate flavor—nothing fancy, just honest-to-goodness basics that really shine.
- Cream Cheese: Adds luxurious moisture and richness, making the crumb extra tender and never dry.
- Unsalted Butter: Essential for both cake and buttercream, it delivers depth, creaminess, and a beautiful mouthfeel.
- Granulated Sugar: Sweetens the batter while contributing subtle caramelization and structure.
- Egg Whites: Whipped in for structure and fluffiness, keeping the cake snowy white and light.
- Cake Flour: Lower protein content ensures a gentle, melt-in-your-mouth texture you’ll adore.
- Baking Powder & Baking Soda: Work hand in hand for a lofty rise and perfect crumb.
- Salt: Balances out the sweetness and highlights all those wonderful flavors.
- Buttermilk: Adds subtle tang, keeps the cake tender, and teams up with leaveners for a nice lift.
- Vegetable Oil: Guarantees extra moisture so the cake stays soft for days.
- Clear or Pure Vanilla Extract: Gives the cake its signature sweet aroma—clear for pristine white layers, pure for richer flavor.
- Powdered Sugar: Makes the buttercream silky-smooth and easy to spread.
- Milk or Heavy Cream: Helps fine-tune the consistency of your dreamy buttercream.
How to Make Moist and Rich White Velvet Cake with Vanilla Buttercream
Step 1: Prep Your Pans and Oven
Preheat your oven to 325°F (163°C). Grab three 8-inch round cake pans and give them a thorough greasing and dusting of flour—this guarantees each layer releases effortlessly. Don’t forget the parchment circles on the bottom! This little trick is the secret to immaculate cake layers.
Step 2: Mix the Dry and Wet Ingredients
In a medium bowl, whisk together your cake flour, baking powder, baking soda, and salt. This ensures even distribution for a perfectly risen, fluffy cake. In a separate vessel, gently stir together the buttermilk, vegetable oil, and vanilla extract. Pre-mixing these wet ingredients helps them blend seamlessly into your batter, giving you that ideal white velvet crumb.
Step 3: Cream the Butter and Cream Cheese
In your largest mixing bowl, beat the softened cream cheese and butter until the texture is smooth and creamy. This blend is the secret behind the unique lushness of Moist and Rich White Velvet Cake with Vanilla Buttercream. Don’t rush this step—it’s all about creating a smooth, luxurious base.
Step 4: Incorporate Sugar and Egg Whites
Slowly add your granulated sugar to the cream cheese-butter mixture, whipping everything up for about 2–3 minutes. You’re looking for airy and pale, almost mousse-like. Next, mix in those luscious egg whites, one at a time, making sure each is fully incorporated before adding the next. This patience pays off with an extra-light, white-hued cake.
Step 5: Alternate Dry and Wet Additions
With your mixer on low, add the dry ingredients in three parts, alternating with the buttermilk mixture and beginning and ending with the dry. Mix only until everything is unified and velvety. This step might test your willpower, but don’t overmix—just until combined does the trick!
Step 6: Divide and Bake
Evenly portion the batter among your prepared pans and smooth the tops. Bake for 28–30 minutes, or until a toothpick poked in the center comes out clean. Your kitchen will smell utterly irresistible. Let the cakes cool in the pans for 10 minutes before gently turning them out onto wire racks.
Step 7: Cool Completely
Allow the cake layers to cool down fully on wire racks. This ensures your buttercream won’t melt or slide once assembled. Taking this little pause makes all the difference between homemade and professional results.
Step 8: Make the Vanilla Buttercream
For the silkiest finish, beat your butter on medium speed for about 2 minutes until it’s nice and creamy. Add vanilla extract and salt, then half the powdered sugar along with the milk or cream. Once smooth, toss in the remaining sugar and keep whipping for 3–4 minutes until it’s cloud-like and fluffy. A quick final low-speed mix ushers out any air bubbles for an extra smooth spread.
Step 9: Assemble and Frost
Place the first cake layer on your serving stand and slather on about ½–¾ cup of buttercream. Add the next layer, repeat, then crown with the final cake round. Spread a thin crumb coat all over and chill briefly—this keeps crumbs locked in. After chilling, frost with the rest of your buttercream, then get creative with decorations like swirls, sprinkles, pearls, or fresh blooms.
How to Serve Moist and Rich White Velvet Cake with Vanilla Buttercream
Garnishes
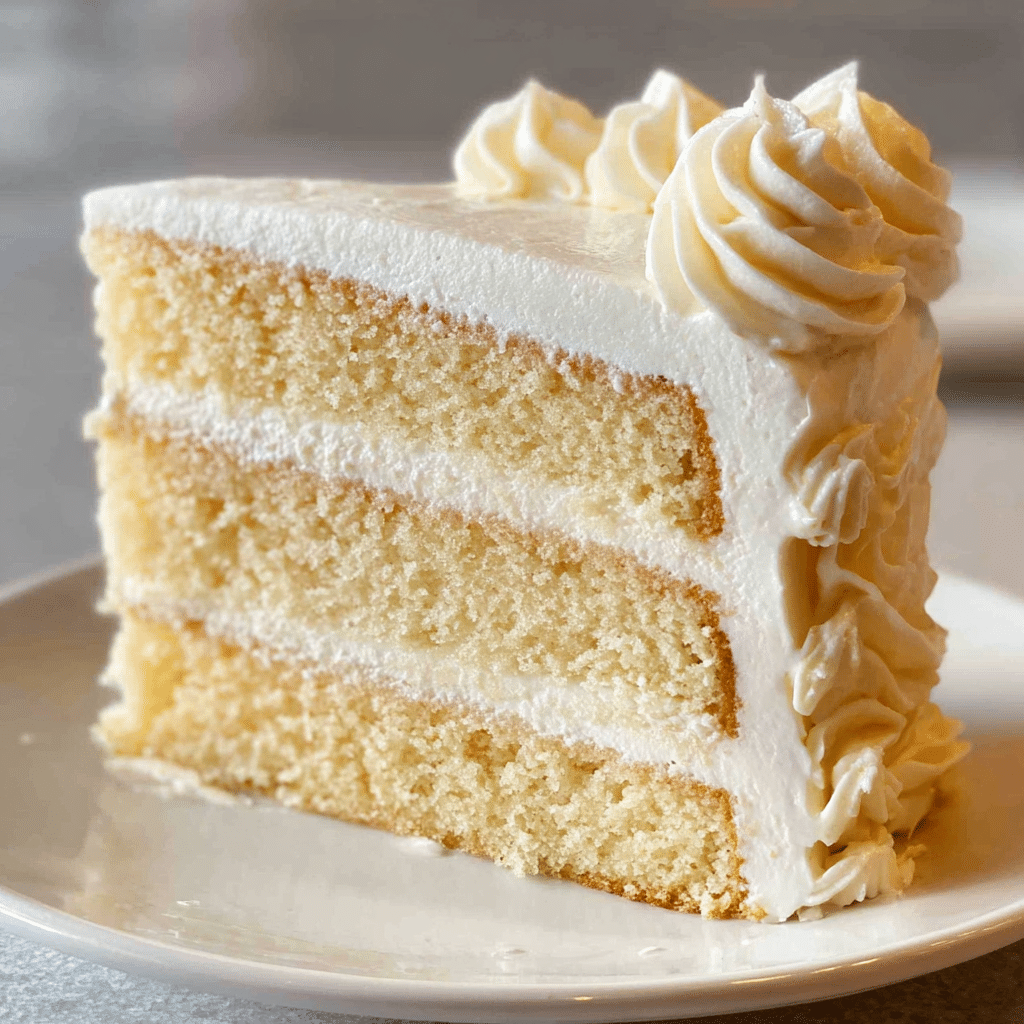
Amp up the wow factor by finishing your cake with piped buttercream borders, a flurry of pastel sprinkles, elegant edible pearls, or delicate fresh flowers. All these garnishes bring an extra layer of joy and sophistication, making your Moist and Rich White Velvet Cake with Vanilla Buttercream as gorgeous as it is delicious.
Side Dishes
For a celebratory tea or dessert spread, pair every thick slice with cups of Earl Grey, fizzy prosecco, or fresh berries on the side. The subtle vanilla and cream cheese undertones in this cake make it exceptionally versatile—think simple berry coulis, lemon sorbet, or even chocolate-dipped strawberries as dreamy partners.
Creative Ways to Present
For a showstopping centerpiece, try stacking decorated cake slices on a tiered stand, nestling raspberries between layers, or crafting dramatic swirls of buttercream with a palette knife. For special occasions, serve mini squares as petit fours, or bake into cupcakes with piped rosettes—endless ways to showcase your Moist and Rich White Velvet Cake with Vanilla Buttercream!
Make Ahead and Storage
Storing Leftovers
Leftover slices stay fresh, soft, and sublime for up to four days when wrapped well and stored in the refrigerator. For maximum moisture retention, press a piece of wax or parchment paper against the sliced edges before sealing in an airtight container.
Freezing
Yes, this cake freezes beautifully! Wrap individual layers or frosted slices tightly in plastic wrap, followed by a layer of foil, and freeze for up to two months. When you’re ready to enjoy, thaw overnight in the fridge and bring to room temperature before serving to revive that perfect, tender crumb.
Reheating
No need for actual reheating, but to enjoy the buttercream at peak silkiness, allow your cake to sit at room temperature for 30–60 minutes before serving. This softens the frosting just enough so every forkful melts in your mouth like the first day.
FAQs
Can I use regular flour instead of cake flour?
You can, but cake flour is key for that delicate, melt-in-your-mouth texture. If you must substitute, remove two tablespoons of all-purpose flour per one cup, and replace with two tablespoons of cornstarch—sift together well before using.
Is there a way to make the buttercream even whiter?
Absolutely! Use clear imitation vanilla extract and let your butter come to almost white by whipping for several minutes. A drop or two of bright white gel food coloring works wonders for truly snowy buttercream.
Can I make Moist and Rich White Velvet Cake with Vanilla Buttercream as cupcakes?
Yes! Just divide the batter equally among lined cupcake pans, filling each about two-thirds full. Bake at 325°F for about 18–22 minutes, or until a toothpick comes out clean. They’re perfect for parties and don’t require slicing!
Does this cake work for stacking or tiered celebration cakes?
Definitely—the structure of Moist and Rich White Velvet Cake with Vanilla Buttercream is sturdy enough for stacking while staying lusciously soft. Chill layers before assembling a multi-tier cake, and use buttercream dams for super clean lines.
Can I add flavors, like almond or citrus?
Of course! Swapping out a teaspoon of vanilla for almond extract or adding some freshly grated lemon or orange zest will give your cake a new twist. Just keep the amounts modest so the classic white velvet flavor shines through.
Final Thoughts
If you’re ready to fall head over heels for your next bake, treat yourself and loved ones to this Moist and Rich White Velvet Cake with Vanilla Buttercream. Every step is worth it for the tender crumb and dreamy finish—there’s just nothing quite as blissful or crowd-pleasing. Happy baking!
Print
Moist and Rich White Velvet Cake with Vanilla Buttercream Recipe
- Prep Time: 30 minutes
- Cook Time: 30 minutes
- Total Time: 1 hour
- Yield: 1 3-layer cake
- Category: Dessert
- Method: Baking
- Cuisine: American
- Diet: Vegetarian
Description
Indulge in the moist and rich goodness of a White Velvet Cake paired with a luscious Vanilla Buttercream. This classic cake is perfect for celebrations or simply satisfying your sweet cravings.
Ingredients
For the Cake:
- 8 oz (226 g) full-fat cream cheese, softened
- 1 ½ sticks (168 g) unsalted butter, softened
- 2 cups (400 g) granulated sugar
- 6 large egg whites, room temperature
- 3 cups (342 g) cake flour
- 2 tsp (8 g) baking powder
- ½ tsp (3 g) baking soda
- ½ tsp (3 g) salt
- 1 cup (242 g) buttermilk
- ¼ cup (54 g) vegetable oil (canola recommended)
- 2 tsp (8 g) clear vanilla extract (or pure vanilla for richer flavor)
For the Vanilla Buttercream:
- 2 sticks (226 g) unsalted butter, slightly softened
- 6 cups (690 g) powdered sugar
- 2 tsp (8 g) vanilla extract (clear imitation if you prefer a whiter color)
- ⅓ cup (72 g) milk or heavy cream, more if needed for consistency
- ½ tsp (3 g) salt
Instructions
- Make the Cake: Preheat your oven to 325°F (163°C). Grease and flour three 8-inch round cake pans, then line the bottoms with parchment paper. In a medium bowl, whisk together the dry ingredients. Stir together the buttermilk, oil, and vanilla. Beat cream cheese and butter until smooth. Gradually add sugar, then mix in egg whites. Alternate adding dry ingredients and buttermilk, then divide batter into pans. Bake and cool.
- Prepare the Buttercream: Beat butter until creamy, mix in vanilla and salt. Add powdered sugar and milk, beat until smooth. Add remaining sugar and beat until fluffy. Adjust consistency with milk or cream.
- Assemble the Cake: Place cake layer, spread buttercream, repeat with second layer. Add final layer, coat with crumb coat, chill, then frost the entire cake.
Notes
- For a richer flavor, use pure vanilla extract.
- Ensure ingredients are at room temperature for best results.
- Decorate the cake with your preferred toppings for a personalized touch.
Nutrition
- Serving Size: 1 slice (1/16 of cake)
- Calories: 450
- Sugar: 45g
- Sodium: 300mg
- Fat: 20g
- Saturated Fat: 12g
- Unsaturated Fat: 6g
- Trans Fat: 0g
- Carbohydrates: 65g
- Fiber: 1g
- Protein: 4g
- Cholesterol: 60mg

